Showing posts with label Beauty tips. Show all posts

Saturday, July 9, 2016

Looking gorgeous and getting ready in under 10 minutes!

1. Use an in-shower moisturizer.
If you hate taking a shower, toweling off, lotioning up, and then waiting a while for your moisturizer to sink in, throw an in-shower moisturizer into your mix. After lathering up with your usual body cleanser, apply a hydrating formula Moisture In-Shower Body Lotionfrom your neck down. The warmth and humidity of the shower opens up your pores, allowing the moisturizing ingredients (hi, shea butter) to be absorbed into your skin, so that after you rinse and towel off, your skin remains super soft. Genius, right?


2. Wrap your hair in a microfiber towel post-shower.
"Gather your hair into a microfiber towel, wrap it on top of your head, and allow it to soak up any excess water while you apply your skincare regimen. The microfiber fabric absorbs water through osmosis, wicking it away. And since 80 percent of your blow-drying time is used removing the water from your hair, this simple step will cut your drying time in half and get you out the door quicker."
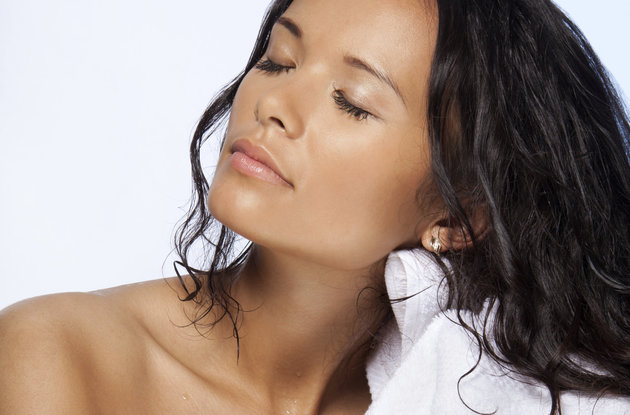
3. Choose one multitasking hair product and apply it with a vent brush to evenly distribute it.
"Applying several products to your hair takes time, So to speed up your routine, use one styling product that does multiple things, and then apply it using a vent brush for even application. Once you've brushed the product into your hair, rinse off your brush and continue styling as you normally would. 

4. Skip a full face of makeup and just apply red lipstick.
"If you're really squeezed for time, apply some red lipstick, You'll look like you spent an hour doing your 'makeup' when you spent only two minutes."


5. Curl your eyelashes, apply some mascara, and go!
Curling your eyelashes seems like an unnecessary step, but it can actually be the only preparation your eyes need to look polished. Doing so not only makes your eyes look more open and awake, but after you apply mascara onto your lashes and trace the inner upper rim of your eye with black liner, your fringe will appear fuller — like you're wearing falsies. At that point, you can skip eye shadow and go!.
6. Revive curly hair with a shine spray.

If you have curly hair or second-day waves that you want to revive, what I often reach for on set in a pinch is an aerosol shine spray, The challenge curly-haired girls have is that their curls absorb the light, making them appear dull. So what the aerosol shine spray does is fills any empty pockets in the curls with its lightweight, tiny molecules that then help reflect the light, making the curls look defined and beautiful.


7. Opt for all cream cosmetics and use your fingers to apply them.
By using your fingers to apply your makeup, you eliminate the time it takes to find the right brush, apply your makeup perfectly using each tool, and then washing them after to avoid bacteria build-up.

8.Having a bad hair day? Throw it into a polished, yet undone chignon.
Everyone has a bad hair day, so when one strikes, throw your hair up into a pretty, low side bun, pin it into place with bobby pins, and go.

9. Skip highlighter around your eyes and just use concealer.
Instead of taking the extra time to add highlighter to the inner corners of your eyes, apply your concealer to cancel out any darkness and lighten those areas up,

10. Get stand-out brows without messing with powders and pencils.
Mixing pencils and powders to fill in sparse spots within your eyebrows can be time-consuming, Instead, use a colored brow mascara. It saves a ton of time because all you have to do is swipe the bristle brush over the tiny hairs and your brows will immediately look fuller. Just make sure to wipe down the brush a bit, so you don't apply too much of the formula onto your brows. You want them to look enhanced, not unnatural.

Thursday, May 1, 2014

Homemade Facial Scrub

Exfoliation is an integral part of skincare regime. It helps to get rid of dead cells from the surface of the skin, improves blood circulation, leaving your skin clean and bright. Natural face scrubs are cheaper and more important they are free of chemicals. You have to keep certain things in mind before using any exfoliating mask. The scrub you choose should be gently and should not damage your skin. Never use scrub on infected or inflamed skin. After exfoliation, it is important to moisturize your skin as exfoliation tends to dry your skin. People with oily skin can exfoliate once in a week, while people with dry skin can exfoliate once or twice a month. Choose scrub according to your skin type, what suits one person may not suit another person. Over exfoliating your skin can cause skin irritation or damage your skin. So do take care of these small things before using face scrub.

How to apply facial scrub
Wash your face well and apply scrub on clean damp skin. Avoid area around the eyes.
Let the scrub dry a little. Wet your hands and exfoliate using gentle circular upward movements.
Scrub lightly as vigorous movements will damage the skin.

Make your own Facial Scrub
Do you know that you can make your own facial scrub at home with ingredients available in your kitchen. Here are a few Natural Facial Scrub Recipes which are easy to prepare at home.

1. Orange peel yogurt facial scrub
Orange peel powder is readily available in the market which you can buy and use. If you cannot get orange peel powder, you can dry orange peels in the sun, powder it finely and store it in an air tight container. Take a tbsp of orange peel powder, mix it with a tsp of plain fat free yogurt and make a paste. Add water if needed to adjust the consistency. Use it as a face scrub.

2. Lentil facial scrub
Dry moong dal (pasi paruppu) well in the sun, grind it to a fine powder and store it in a container. Take 2 tsp of the dal powder, mix it with required milk to get a smooth consistency. Apply it on face and when it is half dry, gently rub in circular upward movement and then rinse off with warm water. Pat dry and apply your favorite moisturizer.

3. Apple Face scrub
Peel the skin of apple, remove the seeds and blend it to a fine paste, add a tsp of honey, 2 tbsp of powdered oats and little water if needed. It is perfect to exfoliate the face.

4. Rice Flour Yogurt Scrub
Mix rice flour with plain fat free yoghurt and scrub your face gently in upward circular movements.

5.Sandalwood gram flour scrub
Mix equal quantities of gram flour (kadalai mavu/besan) and pure sandalwood powder with little raw milk to a paste. Do not buy scented sandalwood powder. Effective for persons with normal and oily skin.

6.Chickpea Exfoliating Scrub
Take equal quantity of sandalwood powder and chickpea powder, mix it with needed water to make a paste. Apply to the face, leave it for 5 minutes and then gently scrub in circular movements using your finger tips. This scrub works great for oily skin.

7.Plain Oatmeal scrub
Take a tbsp of oats and cook with half cup of water. Allow it to cool. Add a tsp of fresh lemon juice to it. You can use just the cooked oats alone as a scrub. It also works great.

8.Yogurt oatmeal scrub
Cook 2 tbsp of oats till soft. Let it cool. Mix it with a tsp of yogurt and honey and use it as a scrub. This is great for persons with dry skin.

9.Cornmeal scrub
Mix a tbsp of Cornmeal flour with water and gently scrub your skin in circular movements.

10.Almond scrub
Almond flour with a tbsp of milk makes a good scrub. Alternatively you can soak 5-6 almonds for 4-5 hours, remove the skin and grind it to a fine paste with milk. After scrubbing for 5-6 minutes, leave it on the face to dry, then rinse off with warm water. Persons with oily skin can replace milk with rose water.

11.Honey Almonds Scrub with milk
Mix almond flour with ½ tsp of honey, needed milk and mix it to a paste.

Home made body scrub

1.Wheat husk Body Scrub
Wheat husk + milk makes an excellent body scrub.

2.Sugar scrub
Sugar especially brown sugar is a great scrub. Mix 1-2 tsp of sugar with 1/3 cup of olive oil and use it to exfoliate your hands and legs. Apply the mixture to wet skin, scrub gently and then wash off using your regular body wash or mild bath soap or bengal gram flour.

These homemade scrubs or natural exfoliating mask will help exfoliate and leaves your skin soft, smooth and refreshing. Get started and pamper yourself at home.

Sunday, December 2, 2012

How to Get Rid of Blackheads Fast at Home

Blackheads are a type of acne also known as open comedones. The blemish occurs when oil becomes lodged in the pores of the skin. When the oil is exposed to the air, it oxidizes and turns a blackened color. To prevent blackheads, control excess oil by washing the face at least twice a day with mild soap and water. You can usually get rid of blackheads fast at home without the need for a dermatologist. 


Step 1 
Boil water in a small pot. Remove the pot from the heat, pour the water into a bowl and then place your head over the bowl. Use a towel to cover your head and trap the steam in. Expose the face to the steam for at least five minutes to open up the pores. 

Step 2
Position the loop of a stainless steel blackhead extractor over a blackhead. Apply pressure to push the blackhead out of the skin. You can purchase a blackhead extractor at a beauty supply store or a drugstore. 

Step 3 
Scoop debris away with the spoon end of the blackhead extractor. Remove the excess oil and debris left behind after extracting the blackhead. Clean and sterilize the extraction tool with an alcohol wipe if you plan to get rid of multiple open comedones. 

Step 4 
Cleanse affected areas with a face wash that contains salicylic acid. Salicylic acid controls oily skin and promotes peeling to help keep your pores unclogged and free of blackheads. Wash your face with the salicylic acid cleanser using lukewarm water at least twice a day. If you experience skin sensitivity, reduce usage to once a day. 

The Best Way to Make Wrinkles Disappear

Wrinkles are the manifestation of natural changes in your skin as you age. The composition of your skin becomes altered with age, so it loses elasticity and forms lines in the areas of the face you use to express yourself. Certain prevention methods can help slow the process of aging, but once you've already seen the wrinkles on your face, treatment methods can be put into action to keep your skin looking smoother and younger. Your dermatologist can help explain some of your options. 

Step 1 
Apply a daily moisturizer to help improve the appearance of your skin, suggests the American Academy of Dermatology. Moisture helps your skin stay youthful be helping it to retain its natural moisture. Dry skin can look dull and wrinkly. Look for moisturizers containing ingredients, including vitamin E, shea butter and petroleum derivatives to help your skin look brighter and healthier. 
Step 2
Purchase anti-aging creams that contain retinoids, suggests MayoClinic.com. Retinoids are derived from vitamin A and can help to reduce fine line, age spots and wrinkles to reveal more youthful-looking skin. Retinoids can make your skin more susceptible to sunburns, so always apply a sunscreen along with your wrinkle cream to protect your skin. Apply in small amounts at first, as they can be irritating to sensitive skin.
Step 3 
Exfoliate your skin on a weekly basis to help speed cell turnover and slough away dead skin cells. Exfoliation can also be accomplished via chemical peels, dermabrasion or microdermabrasion in your dermatologist's office. All three procedures remove the top layer of dead skin cells to reveal smooth skin underneath and to help stimulate your body's natural skin cycle. The more often your body creates new skin cells, the younger your skin will look. 
Step 4 
Ask your dermatologist about fillers and injectables to help smooth out your wrinkles. Some collagen-based fillers can be injected directly into the wrinkle to help plump the surrounding skin, with the results lasting from three to six months. Botox is another popular choice, which basically freezes the muscles around the expressive areas of your face to achieve a smoother-looking appearance, notes the American Academy of Facial Plastic and Reconstructive Surgery. 
Step 5 
Talk to your dermatologist about laser resurfacing, which can help get rid of stubborn wrinkles. MedlinePlus notes that this particular treatment works best for new wrinkles, and uses a series of lasers to basically remove the damaged skin to allow new, more youthful-looking skin to grow in your place. Only your dermatologist can tell you if you and your wrinkles are good candidates for the procedure.

Sunday, October 14, 2012

HEALTHY WHITE WITH RICE FACIAL PEELING


Every Woman in the world wants their face skins are smooth, fair and healthy. Most of them prefer to try modern facial treatment than traditional treatment even the unnatural facial treatment contains a lot of skin trouble risks. “Instant” or quick is the answer they prefer it. That is why, our beauty tips today is about traditional healthy white by using rice facial peeling in order women knows natural facial peeling is safer than unnatural one. Moreover, don’t you know rice peeling can make your skin youthful and smooth looking?
I’m sure you are curious about why does the rice peeling work? The fact is rice contains a high concentration of PABA (para aminobenzoic acid) which is a very good sunscreen. PABA itself also raises the Vitamin C levels in our bodies if it taken internally.  Rice also contains two other sun protecting agents – ferulic acid and allantoin. According to scientist the sun protection ability will be doubled if  ferulic acid is added to Vitamin C and E. Thus, Ferulic acid is considered as an antioxidant besides allantoin is a good anti-inflammatory agent. Allantoin soothes sunburns and also promotes the skin’s repair.
How to make the rice facial peeling? It’s completely easy and quick. First, you just need to take a palm of rice and soak the rice in water for 10 minutes. Then, drain the water and mash the rice till shaped like fine sand.  After that, you clean your skin face first then you can peel your skin face by using the rice peeling softly. The last, you wash the peeling of with cold water.

HOW TO MAKE YOUR SKIN SMOOTH BY USING SEA SALT AND COCOA POWDER?


Smooth and healthy skin is the most wanted for women. You might already use a chocolate butter or cream, and all stuff skin spa treatment. Don’t you know to make your skin smooth and healthy you are not getting it only in beauty spa, beauty therapy center but at your own home. By making homemade treatment skin care by using sea salt, lime and cocoa powder can be a smart solution for your dry and rough skin. Before we start for the steps, we will give you information why we need to use sea salt, lime and cocoa powder as the ingredients.
Sea salt is being popular in beauty product recently. Many beauty experts found that salt is useful for remove dead skin. In other words, it is an excellent exfoliating treatment. It will help exfoliate the dead skin cells if you scrub the sea salt in your skin. Besides that according to Health-Benefit-of-Water.com cited in livestrong.com sea salt bath therapy provides psychological benefits and improves quality of sleep
In addition, lime is beneficial as anti-aging skin. It prevents the damage of skin and pigmentation. The vitamin C content is useful to make your skin brighter.
Furthermore, in here we also use cocoa powder as our beauty homemade treatment. We are sure you are ever heard of chocolate skin care, you might be having a skin lotion, butter, scrub which made from chocolate. There are plenty reasons why we use chocolate or cocoa powder as skin care as explained below:
  1. It contains powerful anti-oxidant which helps reduce free radical
  2. It nourishes your skin.
  3. It softens your skin by its deep moisturizer.
  4. It   can smooth wrinkles.
  5. It heals the skin irritation and prevents the damage of skin elastic and other protein, collagen as well.
  6. It can exfoliate the dead skin and regenerate the new one.
At last, we will tell you about the steps of making the homemade skin care by using sea salt, lime and cocoa powder.
First, prepare three tablespoons of sea salt into a small bowl.
Second, slice a half of fresh lime and squeeze it to the sea salt then mix it.
Third, before you exfoliate your skin by using the sea salt and lime, you need to prepare four tablespoons of cocoa powder in separated bowl then pour a little warm water into the cocoa powder.
Then, stir it until look thick and smooth.
After that, exfoliate your whole body skin by using sea salt and lime mixture. Scrub it softly. Then, let stand it for 5 minutes then rinse it off by using cold water.
After you dry your skin off, mask your whole skin body by using the melted cocoa powder and let stand it for 15 minutes.
Last, rinse it by cold water and feel your velvet skin. Happy try!

Sunday, September 9, 2012

Smokey Eyes Makeup

Smokey eyes have always helped in creating a very glamorous, sexy and attractive look. Find out how you can create gorgeous smokey eyes so you can look your best at every special event.
It is believed that the eyes are the gate to the soul and this is why beautiful eyes attract so much attention. Eye make-up is one of the best ways to enhance your facial features by making them pop. There are a variety of ways you can enhance your eyes, depending on preference and the shape of your eyes. Before one decides to perform the make-up, it is best to find out the eye shape. The eyeshadow needs to be applied correctly and differently for every eye shape in order to enhance or conceal different parts of the eyes.

One of the greatest ways to enhance the eyes is with the help of smokey eye make-up. Smokey eyes look great and are a great make-up for formal and less formal occasions. It all depends on the colors used to create the make-up. Smokey eyes can be performed using different colors like: gray tones, plum tones, green tones, lavender tones, red tones, blue tones or different combinations like black and red black and blue. Choose the color according to the time you are wearing it, using lighter colors for daytime and darker colors for nighttimes.
The best way to create smokey eyes is by using professional make-up brushes. These make-up brushes will help to create the best effect of the smokey eyes.


It is recommended to use a primer on your eyelid before the eyeshadow is applied. The primer will ensure a better application of the eyeshadow and a longer stay.
It is best to use good quality eye shadows because that is the only way you will be able to create the perfect smokey eyes. Good quality eyeshadow has a better coverage and the eyeshadow can be applied easier. To create smokey eyes you will need 3 eyeshadow shades. Shimmery eyeshadow looks great on smokey eyes, but matte eyeshadow looks awesome as well.
You can use powder eyeshadow or creamy eyeshadow, depending on each person's preference.

Apply the primer to the entire eyelid and apply using a small make-up brush the lighter colored eyeshadow on the brow bone. Take the second lightest eyeshadow and apply the eyeshadow on the inner corner of the eye until about three thirds into the lid. Take the darkest colored eyeshadow and apply it on the outer corner of the eye working your way on the lid. Make sure you apply a little bit of the dark eyeshadow over the second lightest color. Blend the dark colored eyeshadow well into your crease by wiggling the brush back and forth.

Take a clean brush, a blending brush and blend the dark colored eyeshadow with the second colored eyeshadow to obtain a uniform transition from one color to the other. Apply more eyeshadow of each color if necessary.

Apply a little bit of the second lighter color eyeshadow using an angled brush on your lower lid until about half way starting from the inner corner of the eye. Apply the darker color over the outer corner of the lighter eyeshadow continuing up towards the outer corner of the eye.
Take a liquid eyeliner and draw a fine smooth line on your upper lid starting close to your lashes from the inner towards the outer corner of the eye.


Curl your eyelashes and apply plenty of mascara on. You can try false eyelashes for a more glamorous effect.
Choose the combination of colors you like best and you will look dazzling.
 

Sunday, September 2, 2012

5 Eyebrow Mistakes


Eyebrows give a beautiful frame to the face, they highlight your eyes and enhance your features. Today you can read about 5 eyebrow mistakes women usually make when trying to pluck their eyebrows at home. 
Eyebrows can have a big impact on your look. Women usually either neglect them totally or on the contrary, they start to over pluck them. However it is better to avoid both of these two extremes. 
Many women don’t know how to pluck their eyebrows properly but they are experimenting with it.
The importance of the eyebrows should not be underestimated. They can totally change your facial expressions. Neglected, shaggy eyebrows will give you a cluttered and untidy appearance.
However, the right eyebrows can flatter your face and will make you look fresher, younger and tidier. One or two plucks in plus and your nice eyebrows can really look scary. If you know what are the basic things to avoid when grooming your eyebrows, you can quickly learn how to correct your mistakes and how make them look perfect. Check out the most common ugly eyebrow mistakes!


  • Over plucking
    This is one of the most frequently met problems when it comes to brows. The majority of women and mainly young girls don’t consult a professional before tweezing their eyebrows for the first time and they easily develop a tendency to over pluck their eyebrows. If you make your eyebrows too thin, your eyes will get less accent, they won’t be so defined, and your face can get a dull, unexciting look.
    When you are over plucking your elbows, there is a possibility that on some parts it won’t grow back.
    As compared to the extremely thin brows look of the past, nowadays, the natural, fuller eyebrows are trendy. If you are endowed with thicker brows, you can create a wonderful, natural looking brow shape. Our advice is to consult a professional in order to get some tips and have them done properly. Once your cosmetician has determined their basic shape, you will only have to maintain their ideal form.


  • Drawing Your Eyebrows With a Dark Pencil
    If you have sparse eyebrows, don’t try to fix this problem by using dark eye pencils. This mistake is also very common. If you want to fill your brows, you can avoid this unnatural look by opting for a pencil that is one or two shades lighter than the color of your hair.
    Another great option is to use an angled brush and fill the sparse areas with brow powder. If your eyebrows are really sparse you can carefully fill these gaps, first with a pencil then by adding a little powder to make them look more natural.

  • Trimming Too Much Of Your Brows
    If you want to give your eyebrows a beautiful, natural contour, you can shape your brows by trimming those hairs that are too long, mainly in the front part. However, cutting down many hairs at once and trimming them too short can totally destroy the shape of your brows.
    In order to avoid this nasty problem, brush your eyebrow hair upwards and trim the hairs one by one, cutting only one at a time. Trim only those that are longer than the rest, not to make them too short. In order to achieve a wonderful shape, make sure that the inner part is a little bit thicker than the outer end of your brows.


  • Taking Too Much off The Ends
    Short eyebrows look less elegant than nicely shaped, longer eyebrows. You can easily find the ideal end for your eyebrows by touching your brow bone. The point where this bone ends should also mark the end of your eyebrow.


  • Tweezing Too Frequently
    Grooming your eyebrows every day is too much because it is not necessary to pluck them too often. Your eyebrows will look gorgeous if you tweeze them only once in a week. If you develop the bad habit to groom them each and every day, you can also remove hairs that are essential to maintain their beautiful contour. Start to stay away from the tweezers so that you won’t feel the necessity to pluck your brows.
  • Having well shaped, perfect eyebrows is as important as makeup or clothing. If you have a great contour to your eyebrows your eyes will get more emphasis and your look will become deeper and more sensual. Beautiful brows give a nice frame to your face and your whole appearance will be more youthful and feminine. 

    Sunday, August 19, 2012

    How to look five kilograms lighter


    Hot summer weather makes people sweat a lot. It is the time of year for people to hide their surplus fat and expose themselves to help cool down. However, people who have a chubby upper body may hesitate at the thought of exposing their thick arms and love handles.
    Wearing short pants and a loose top is a way to draw attention to legs and away from the upper body. Let’s find out what kind of summer styles will make you look like you’ve lost five kilograms.
    Straight style makes you look bigger
    Koyote’s Shin Ji always wears clothes that make her waistline stand out. She is a little chubby as entertainers go, but she isn’t afraid of the exposure. She chooses clothes that have banding in the chest and complements her voluptuous figure with a vest to make her waist look slimmer.
    Wear clothes with a low-cut neckline
    V-necks are good for people who have a chubby upper body. This body type usually has a chubby face and neck as well, so a polo shirt with a collar can make them look as if they’re stuffed into their clothes.
    Seo Woo, who has a voluptuous figure, usually wears clothing with a plunging neckline. It makes her look slimmer and makes her neckline stand out and look refreshing. Bada and Eugene, former members of girl group SES, are slim, but they have bigger upper bodies, so they usually wear short pants or skirts with simple tops to draw attention to their legs.
    See-through lace cardigan look
    Thick arms and broad shoulders make women look less feminine. Cardigans are a good way to cover up surplus fat and look slimmer. A see-through lace cardigan can make the wearer look slimmer, and the sheer fabric is a refreshing solution to the real-world heat.
    SNSD’s Seohyun wore a lace cardigan to shoot a pictorial for the fashion magazine @Star1. Even though the cardigan has long sleeves, the lace makes it comfortable to wear in the summer.
    Actress Shin Min Ah wore a black long-sleeved see-through at a press conference for SBS’s series My Girlfriend is Gumiho. Even though it was hot, her see-through look was sexy and didn’t look warm. The black color also helped slim her appearance. miss A’s Suzy also wore a long-sleeved see-through blouse and showed off her innocent yet sexy charm.


    Thursday, August 16, 2012

    Diet Tips for Glowing Skin

    Having bright, glowing skin can give you a boost in your self-confidence. You can try all sorts of brightening creams, moisturizer and glitter, but the best way to get glowing skin is to begin with what you put in your body. Choosing the right diet can net you glowing skin that is fresh and, above all, noticeable. Does this Spark an idea? 
    Foods to Eat
    Science Daily recently compiled a list of foods you can incorporate in your diet that have a proven effect on getting brighter, more glowing skin. Many of these foods are also recommended by the USDA for optimum health. Choosing fruits and vegetables with bright colors, such as dark, leafy lettuce, blueberries and oranges, gives your skin essential vitamins C and E, which help in the regeneration of skin cells. They are also antioxidants, which shield your skin from age and damage. Choose calcium-rich foods such as milk and cheese, which contain vitamins A and C, essential for skin regeneration.
    Foods to Avoid 
    While many foods will help your skin get that glow, there are also foods that cause your skin to look dull that you should try to avoid. While restricting foods won't automatically clear up your skin problems, you may find that avoiding them helps your skin condition get better. If you notice that a food aggravates your dry skin, acne or psoriasis, avoid it. You might keep a food journal where you can record some of the foods that cause flaky or dulling skin, since everyone's skin reacts differently to trigger foods.
    What to Drink
    When doing a healthy skin diet, make sure that you keep hydrated. A minimum of eight glasses of water per day is necessary to keep skin hydrated and looking dewy and moisturized. Caffeine can dehydrate the skin, so it's best to cut out drinks that contain it such as coffee and soda. The same goes for alcohol, which can have a dehydrating effect.


    Sunday, August 12, 2012

    Diminish Wrinkles in a Few Easy Steps


    The sight of your first wrinkle may cause you to cringe and start to look for anti-aging tips that will help to reduce the appearance of them. There are many products on the market that promise to have anti-wrinkle effects, but do they actually work?
    According to Mayo Clinic, there are anti-wrinkle treatments that may help to reduce the appearance of wrinkles. Treatments are classified into topical creams and surgical/other procedures some of which may seem extreme for some people. .
    1. Topical Retinoids – retinoids, which are derived from vitamin A, may help to reduce the appearance of wrinkles, uneven skin coloration and skin roughness. These topical creams are usually prescribed by your doctor. However, there are many non-prescription anti-wrinkle creams available as well. If you are going to select a non-prescription anti-wrinkle cream, opt for products that have the highest concentration of an active ingredient for best results.
    2. Botox injections – this involves an injection into muscles of the face that causes the skin to flatten and appear smoother because the muscles can’t tighten. In order to maintain the effect, repeated injections are necessary as typical injections will only last about three to four months.
    3. Fillers – soft tissue fillers can be injected into the deep wrinkles that appear on the face which will help to smooth out wrinkles. These fillers include fat, collagen, and hyaluronic acid. As with Botox, soft tissue filler injections may need to be repeated for lasting anti-wrinkle effects.
    4. Micro-dermabrasion – A vacuum suction is applied with aluminum oxide crystals to remove the top layer of skin cells which provides a more even texture to the surface of the skin and fine lines and wrinkles are minimized. Again, repeated treatments are usually necessary to sustain anti-wrinkle effects.
    5. Laser/Light Therapy – Energy from a laser or pulsed diode light removes the top layer of skin which stimulates the growth of new collagen fibers, this results in smoother looking skin. Several treatments are usually needed to see results.
    It is important to remember that as you age, changes will occur to your skin and no treatment will completely stop the changes associated with aging. Multiple, repeated anti-wrinkle treatments are often needed to maintain the look of wrinkle free skin. Before considering these treatment options, speak with your medical provider to determine if it is suitable for you.
    More Anti-Aging Tips
    Although science is continually developing new treatments that provide an anti-wrinkle effect, one of the best anti-aging tips when it comes to wrinkles is to protect your skin from an early age to minimize the development of wrinkles. This will help to minimize the need future treatment which is often quite costly. Anti-aging tips to protect your skin from wrinkles include:
    1. Protect your skin from the sun – wear sunglasses and hats with wide brims to protect your face and always wear sunscreen when outdoors. Choose products (moisturizers, lip balms, etc.) that contain SPF that protect against UVA and UVB rays.
    2. Moisturize – while moisturizes won’t prevent wrinkles, they may help to provide an anti-wrinkle effect by masking the lines and creases.
    3. Quit Smoking – this is one of the most important anti-aging tips, in addition to improving skin tone and preventing future wrinkles from appearing, quitting smoking has numerous other health benefits.
    4. Eat healthy – incorporating plenty of fresh fruits and veggies into your diet may have an anti-wrinkle effect, although future research is needed in this area.
    5. Get enough sleep – getting enough rest is essential for the production of growth hormone. Growth hormone helps to maintain the skins elasticity, providing an anti-wrinkle benefit.

    Saturday, July 28, 2012

    10 Fast Beauty Tricks


    1. Quick Cleanse! 
    No time to cleanse? Try keeping makeup-wipes in your purse and using those instead!
    2. De-poof Your ‘Do!
    Get rid of that frizz! Wet your hands with water and a drop of hand lotion, then gently pull your hair back into a French twist. Wait 10 minutes; take your locks down. BADABING! No more crazy flyaways!
    3. Degrease Your Dome!
    If scalp grease (or product build-up) have left your hair looking like a dirty mop, sprinkle translucent powder or dry shampoo over your roots, then brush through.
    4. Fake a Healthy, Flawless Glow!
    Hold up! Concealer is only half the battle. To really perfect your complexion (regardless of skin tone), try wearing lipstick in a warm pink. It distracts people’s eyes from imperfections and spots.
    5. Get Gorgeous Nails — FAST!60-second strategy: Remove all polish, clean under your nails (with lemon juice, if you have it) and massage the thickest lotion you can find (lip balm will suffice in a pinch) into your cuticles.
    6. Give your face a wake-up call!
    Look more luminous and awake by applying white eye shadow to four key points: the inner corners of the eyes, the brow bones, the temples and above the peaks of your upper lip. Light skin tones look best with a white shadow that has cool blue undertones; darker complexions need a complementary golden or off-white version.
     7. Get tan and toned
    Get gold by mixing liquid bronzer with a firming body cream, then massage it into your arms. It’ll temporarily tighten your skin and give it a sexy glow.
    8. Give that hair flair!
    A glittery accessory adds instant glamour to any hairstyle. Forgot to bring one? Use the brooch from your sweater!
    9. Still look tired?
    Sleepy eyes need at least one coat of mascara to give them definition. Step One separates and defines lashes, while Step Two coats lashes and boosts volume.
    10. Add a touch of glam!
    When all else fails, sparkly earrings add interest and brighten up any look!

    Sunday, July 15, 2012

    Make Eyes Appear Larger !


    • Curl Your Lashes- One of the easiest secrets to utilizing eye makeup routine to correctly make your eyes look larger is to curl your eyelashes. It’s important you curl your lashes BEFORE you apply the mascara! If you forget to do it before applying your dark mascara, be sure to wait until the mascara has dried completely and then go ahead and curl them. If you find throughout the day your lashes aren’t as curled as they were in the morning when you first applied your makeup, you can always re-curl them later in the day since your mascara will be very dry by then.
    • Apply Mascara on Your Bottom Lashes- Many women think they don’t need mascara on their bottom eye lashes. However, most makeup experts believe adding mascara to the lower lashes can help to enlarge their appearance. The trick is to know how much to use on those bottom lashes! Start by applying the mascara to the top lashes. Then, with whatever is left on your brush (without redipping it into the mascara formula), apply it to the lower lashes. Hold your brush vertically and sweep it back and forth over the lower lashes to get the right look.
    • False Lashes for Evening- If you want to go for a dramatic dark night time effect, you may want to try your hand at false lashes. Most celebrities do use false lashes for big events. If you know how to do the lash application properly, they can be beautiful and natural. Many larger department stores can help you learn how to apply lashes at one of their cosmetics and beauty products counters but they are also available at drugstores. Be sure to practice before your big event. You can also remember to use scissors to trim them (before applying them) if they are too long.
    • Use White Eye Liner in the Right Places- Another technique to use involves the creamy white eye liner pencil. This can help you get a doe-eyed style that will brighten and widen your eye appearance. To get this look, simply line the lower inside of your lids with the creamy white eye pencil. Make sure to use a soft pencil to lessen the irritaion on your lid. You can find great liners from Sephora, Loreal or Estee Lauder. To further brighten your eye area, use this soft color also on the inside corner of both the upper and lower lids.
    • Apply Highlight Eye Shadow- If you don’t like the idea of the white shade of liner, you can also use a platinum highlighter to open up the eye area. Simply apply your shadow as usual and then use the highlighter on small dots along your browbone just below your eyebrow. Blend it in with the shadow in that area, apply it to the inner corners of the eyes and enjoy your new look.
    • Keep Eye Brows Plucked & Well Shaped – For larger appearing eyes, you must also pay attention to your brows. Be sure you manicure them well. It’s a great idea to visit a professional to get your brows waxed, tweezed or threaded. A pro can help you shape them properly. In between pro visits you can maintain them by tweezing. If you have a slight arch to your brows, you will find your eyes look larger.

    How to Apply Lipstick


    Most of us are naturals on how to apply lipsticks. Or are we? Here are some things to apply lipsticks to perfection:
    Focus on one feature and promote it- If eyes are your best feature then do them up with a minimal nude lip. If you love your smile then apply a red that you feel comfortable wearing and make your lashes stand out. The worst thing you can do is highlight all your features as people won’t know what to concentrate on and you will look well overdone.
    Exfoliate dry chapped skin by rubbing your lips gently with a gentle face scrub or a soft baby tooth brush. Apply some lip balm on your dry lips to moisturize them a little.
    Apply rest of your makeup before putting on lipstick and lip liner.
    Apply a lip liner along the edges of your lips. Do not use a liner which is darker in shade than your lipstick or gloss. Start at the center of the upper lip and work towards the corners of your mouth. To “plump” you lips, apply liner a little outside your natural lip line. Dab some gloss in the middle of your bottom lip. To apply liner smoothly rest your elbow on a firm surface.

    Choose lipstick colors that match the natural shade of your lips. Matte lipsticks complement a workday makeup, while satin and gloss finishes are useful for evening looks. Apply matte lipsticks to make your lips look smaller. Orange or brown shades tend to make teeth appear yellow. If you have yellow teeth use lipstick with a bluish undertone. Women with fair complexion should apply pink shades. Apply light shades on a broad mouth. If your lower lip protrudes out, apply dark shade lipstick in the middle of the lips and draw light outline.
    Take some lipstick onto a brush and fill the outline of the lips. Open your mouth to colour the corners of your lips.
    Blot excess lipstick with a tissue paper. But if you want the shimmer on your lips, do not blot after the final application. Take your index finger and pop it into your mouth, rolling your lips around it. Then pull it out taking the excess lipstick on it. This will prevent the lipstick from staining your teeth.
    How to make your lipstick last- Start with the base of concealer all over the lip, just a small amount. Line and fill in the lip with your lip liner and then powder. Use your lipstick and this should last for at least four hours. For extra long wear powder the lipstick and reapply. For extra glossy shine, apply frosted highlighter or gloss on the centre bottom lips. Lip liner can not only help you get clean edges of the overall effect of lipstick but keeps the product from bleeding and wearing off.
    If you are going to sip from a glass lick your lips a little before taking a sip.

    Thursday, June 28, 2012

    5 Beauty Tips For Your Hands


    Many of us spend time and money spent on anti-aging products and treatments for the face.
    However, one of the main areas that show age are our hands, and they are constantly exposed to the sun and this is a factor for the aging of our skin.
    To make matters worse, the skin on our hands is thinner than the skin covering the face. 
    Follow these 5 tips to maintain a youthful appearance and soft in your hands, and keep the rest of the world guessing your age!
    Exfoliate your hands
    In the same way that exfoliate the skin on your face, you have to remove the top layer of skin on your hands to reveal fresh skin beneath. 
    At home microdermabrasion crystals you can use either the classic recipe for a teaspoon of sugar combined with coconut oil. While this does not remove peel brown spots, leave your hands with a more smooth and soft. 
    The key is to exfoliate regularly. You can also use a professional chemical peel to exfoliate and eliminate dark spots, but remember that sometimes these procedures are too strong for the skin covering the back of your hands. An alterative is to use homemade fresh lemon juice on your hands for as long as you can tolerate and then rinse. The citric acid of lemon juice is a mild exfoliating agent and also help dispel some stains. But do not forget that while you have lemon juice on your hands should not sun exposure. 
    Use moisturizer with SPF at least 15 
    If you find a moisturizer with SPF that you love, use it all the time. Thus achieve the desired moisture along with protection. Sun exposure damages the collagen in our skin. Collagen also gives our skin volume, and once the collagen is affected, wrinkles begin to appear and skin becomes thinner. 
    Pamper your hands 
    Every time you wash the dishes, or expose your hands for a long time to water, be sure to wear gloves. Also try to use a heavy cream or oil as olive oil or coconut oil on the gloves for a moisturizing treatment. 
    In addition, if you use any anti-oxidant serum for the face, you can also apply on the hands. Apply these serums at night before moisturizer and during the day before moisturizer with SPF. You can also try the same moisturizing facial masks in their hands. 
    Lasers for brown spots and sagging skin 
    Age spots or brown are a telltale sign of aging. To remove brown spots, the best treatments are laser. There are also laser treatments to tighten loose skin of the hands, these treatments also help to stimulate collagen production, resulting in healthier skin. 
    Vanishes veins and injection sclerotherapy fat 
    With the passage of time as the skin becomes thin, the veins in your hands may look like a lump. In sclerotherapy, the injection of a solution that irritates the vein walls which reduces the diameter IV, which ends with the veins that appear to bulge. This treatment may take several weeks to see the full results and stop procedure is best small veins, or superficial. 
    However, for larger veins it is recommended that treatment is complete around the veins with fat, thus creating an illusion of volume. 
    To fill the medical use your own fat (extraction from the thighs or buttocks).
    Follow these tips and manages to younger hands.

    Friday, June 15, 2012

    Tips For Natural Beauty

    A lot of people are always looking for makeup tips, eyeliner tips, lipstick tips, etc… However, there is a base to wearing your make up. You have to make sure that your natural beauty is in premium shape, so your makeup is going to look its best on you. Therefore, I am going to list some natural beauty tips that is going to help you out. A lot of people do not even know about these, but they can definitely slow down the aging process and get you looking your best.
    • You should consider sleeping on your back as much as possible. Sleeping on your sides and stomach can cause you to get wrinkles on your face and can also cause you to get wrinkles in your cleavage area.
    • If you are guilty of wearing clothes that are too tight, you will look like you are heavier than what you actually are. Even if you are a skinny woman, you can still bulge if you are wearing jeans that are too tight on you.
    • A lot of women forget this tip, but they need to remember it. Always put on a coat of clear nail polish before painting your fingernails. That way, your fingernail polish will not become discolored.
    • If you are a person that gets angry easily, you may want to consider lightening your mood. Anger will cause you to get wrinkles down the road.
    • Unfortunately, a lot of women wear too much makeup. In reality, if they wore less makeup, they would actually look younger.
    • Everyone need to take their vitamins in order to look and feel young. However, you have to remember that more is not always going to be better for you. If you are taking in too much Vitamin A or selenium, you may be a victim of hair loss.
    • If you do not like the hair conditioner that you are using, you can still use it for shaving cream on your legs.

    Sunday, May 20, 2012

    How to get gorgeous breasts

    If you want to show off a perfect cleavage, your chest requires care! Discover our natural homemade beauty treatments to maintain a toned chest and firm breasts.


    The nature of breasts
    The breasts are the most fragile part of a woman’s body. They are composed of mammary glands, fat, blood vessels and sensory nerves.
    They are held up by the skin and adjoining muscle. Subject to gravity, pregnancy, repetitive dieting and hormonal change, with time they sag, swell and shrink, sometimes disproportionately.
    The skin stretches sometimes until it breaks, causing stretch marks. The eperdemic envelope of the bust has to cope with tension and stretching as our breasts age.
    What can you do to keep your breasts looking good?
    - Choose a well-fitting bra and wear it every day to support your chest.
    - End your shower with a blast of cold water to the breasts, but make sure it’s not too strong so as not to damage skin fibres. Spray in a rotational movement from the outside in, in a figure of eight from one breast to the other.
    Cold water instantly constricts blood vessels, stimulates blood circulation, improves cellular exchange and visibly tightens tissue.
    What are the best natural recipes?
    - To firm the skin, make an infusion with 30g wild thyme, 30g thyme and 30g rosemary.
    Let it cool, filter and apply the lotion to your breasts. Leave on for 10-15 minutes and then rinse with a blast of cold water.
    - To hydrate and soften your breasts, massage them, always from the outside in, going around the nipple. Use avocado oil, argan oil and jojoba oil.
    You can mix them together in equal parts (50ml each, for example).
    avocado regenerates, protects, is rich in vitamins and suitable for sensitive skin. Argan oil is rich in antioxidants and Vitamins, A, B, C, D, E and PP, and slows down skin ageing. Jojoba hydrates, restructures and nourishes the skin deeply.
    Good habits to adopt
    Get into the habit of doing toning exercises every day, to stop your breasts from sagging.
    Stand in front of a mirror, arms at right angles in front of you, join your hands together as if in prayer, keep elbows outwards and press your palms together.
    Do this 20 times. In the same position, raise your arms vertically and then lower them at chest level.
    Repeat 10 times.
    Standing up straight, arms relaxed behind you at hip level, raise them slowly.
    You should feel a slight pulling under the chest. Let go.
    Repeat 20 times.